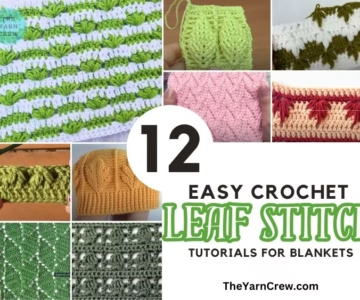
How to Join Crochet Granny Squares: 5 Easy and Useful Techniques


5 Simple Ways to Join Crochet Squares
You have made a stack of beautiful granny squares. Maybe they are all the same color, or maybe they are a rainbow of shades. Now what? You need to learn how to join crochet granny squares, and I have curated 5 tutorials for you.
The big question often becomes: How do I put them all together? This part can sometimes feel like a puzzle, but it does not have to be hard.
Knowing how to join crochet granny squares is a key skill for many projects. It helps you turn a pile of squares into a finished blanket, a sweater, a bag, or anything else you dream up.
A good join makes your project look complete and professional. It brings all your individual squares into one single, strong piece.
Many crocheters finish their squares and then feel stuck. They wonder which joining method will work best for their specific project. Should the join be flat and almost invisible?
Or should it add texture and become part of the design? The way you connect your squares matters a lot for the final look.
There are many different ways to connect your squares, and each one gives a different look and feel. Some methods use a yarn needle to sew the squares together.
Others use your crochet hook to stitch them directly. The choice you make impacts the final look, how strong your project is, and even how it drapes.
A thick join will make a sturdy blanket, while a flat join is better for garments.
In this blog post, I will share eight easy and useful techniques for connecting your granny squares. You will see options that are good for beginners and others that add a special touch to your work.
My goal is to make the finishing step of your granny square projects less confusing and more fun. By the end, you will have a clear idea of how to join crochet granny squares for any item you want to make.
Getting your squares connected smoothly means your hard work will shine. This guide offers practical advice and clear steps on how to join crochet granny squares and helps you master this important part of crocheting.
It shows you how to choose the right method for your needs. This knowledge helps you finish more of your projects with confidence.
Please note, that this post may contain affiliate links. I will earn a small percentage if you purchase any item through the links on this site, but it will be at no cost to you. You can see my full disclosure policy here. Thank you for supporting my work and this blog.

If you found this post helpful, please like and share. Follow me on Pinterest for more crochet inspiration. Follow us on Instagram and Facebook @TheYarnCrew.
Picking the Right Join for Your Work
This collection of joining methods is designed to help you with any granny square project. You will find different ways to connect your squares, whether you like to sew or use your hook.
The patterns show you how to create various looks. Some methods result in a flat seam that hardly shows. These are good for items where you want the squares themselves to be the main focus.
Other methods build a raised ridge or a decorative line between the squares. These added textures can make your finished item more interesting.
You will learn about sewing methods like the whip stitch or the reverse mattress stitch, which use a tapestry needle. These often create a neat, strong seam.
Then, there are crochet methods, such as the single crochet join or slip stitch join, where you use your hook to work stitches directly into the edges of your squares.
Some of these methods even let you join your squares as you make them, saving you time at the end. This means less weaving in ends and a faster finish.
You will see why each method works well for certain projects.
No matter your skill level, you will find options here that you can do. Each technique is explained clearly, often with photos or videos, so you can follow along easily.
Learning these different ways to connect your squares will make your finished projects look much better. You will be able to pick the best method for a blanket, a sweater, or a pillow.
Knowing how to join crochet granny squares with different techniques gives you more control over your designs. It lets you try new ideas and finish your pieces with a professional touch.
This list offers many practical ways to combine your squares, making your work stronger and more pleasing to the eye.
This knowledge is important for any crocheter who wants to learn how to join crochet granny squares well.
1. Granny Square Join Tutorial

This free crochet tutorial shows you how to join granny squares as you go. This method makes a flat edge without needing to sew them together later. It is perfect for granny square blankets, afghans, and sweaters, opening up many new project ideas.
DESIGNER: Jess Coppom of Make & Do Crew.
2. Crochet Squares Joining Tutorial

This guide teaches three easy ways to connect crochet squares. You will learn the single crochet join, the flat crochet join, and the slip stitch join. These methods help you make your projects look neat and strong, and a video shows you how to do each one.
DESIGNER: Hannah Cross of HanJan Crochet.
3. Daisy Afghan Joining Tutorial

This free tutorial teaches you how to connect solid granny squares to make a blanket. You will learn a simple way to join the squares using single crochet stitches. This method adds nice ridges between squares, giving your blanket a pleasing texture. This is part two of a daisy blanket project.
DESIGNER: Sarah Zimmerman of Repeat Crafter Me.
4. Celtic Lace Join

This is a free crochet pattern that shows you how to connect your crochet squares using a Celtic Lace Join. This method makes a pretty, lacy edge when you put your squares together. You can also find two other versions of this join, Celtic Lace Junior and Celtic Lace Mini, to give your projects different looks. This pattern will help you make a beautiful blanket or other square-based project.
DESIGNER: Rachele Carmona of cypress|textiles.
5. Sewing Granny Squares

This free tutorial shows you how to sew your granny squares together for a neat finish. You will also learn a simple way to hide your yarn ends so they stay put. It helps you make a strong and tidy blanket with a pretty framed look for each square.
DESIGNER: Jacquie of Bunny Mummy.

If you found this post helpful, please like and share. Follow me on Pinterest for more crochet inspiration. Follow us on Instagram and Facebook @TheYarnCrew.
Looking For Similar Crochet Patterns?
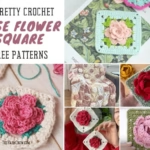
- 12 Pretty Crochet Rose Flower Squares Free Patterns
- 14 Adorable Free Crochet Cat Granny Square Patterns

- 15 Free Crochet Flower Hexagon Motifs To Try Out

- 14 Free Crochet Animal Granny Square Patterns For Baby Blankets

- 10 Free Crochet Spiral Motifs Patterns For Beginner Crocheters

- 7 Free Easy Crochet Heart Patterns For Valentine’s Day